Aussie Geeks’s Voip CloudPBX has a sophisticated call forwarding system which allows you to make changes in real-time. By default calls will divert to our voicemail system. If you wish to disable voicemail or change settings, you can easily do that by log in in Aussie Geeks CloudPBX portal.
Call-Forward and Divert
Aussie Geeks’s Voip CloudPBX allows you to make diversion changes to your service live from Aussie Geek’s Voip CloudPBX Portal. By default, your phone will ring for 20 seconds and then divert to voicemail.
With Aussie Geeks’s Voip CloudPBX you can choose how you want to forward your calls.
Call-Forward Always
Incoming calls will be forwarded directly to the number entered.
Call-Forward When Busy
Incoming calls will be forwarded to the number entered if your handset is engaged or offline/unreachable. If call waiting is active, calls will not divert.
Call-Forward When No Answer
Incoming calls will be forwarded to the number entered if not answered within the specified delay time. Calls will diver tot voicemail (if active) if no number entered.
Delay Time
Calls will ring for the designated time in seconds, before diverting to voicemail or Call-Forward No Answer number (if active)
Control your incoming call flow when you’re away or busy with a permanent call forward. Use time schedules to give you more flexibility, for example, have your calls forwarded straight to your mobile during the day with an after-hours forward to your after-hours voicemail box.
Call Forwarding
Log into your Aussie Geeks’s Voip CloudPBX Account.
Select Switchboard.
Select your Number (or all numbers).
Select Inbound.
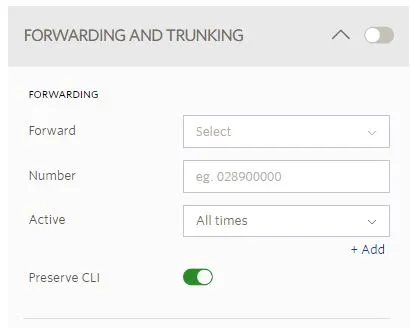
Toggle Forwarding and Trunking.
Set your Call Forwarding preferences including numbers and time schedules.
Toggle Preserve CLI to enable if you want the original caller’s caller ID to show or disable it for your own number to show.